Tuesday, January 12, 2016

Clone Your Cat Head Shaping: A Photo Tutorial

This photo tutorial accompanies the instructions found after round 6 of the head of my Clone Your Cat pattern. (Currently in testing) Now available!


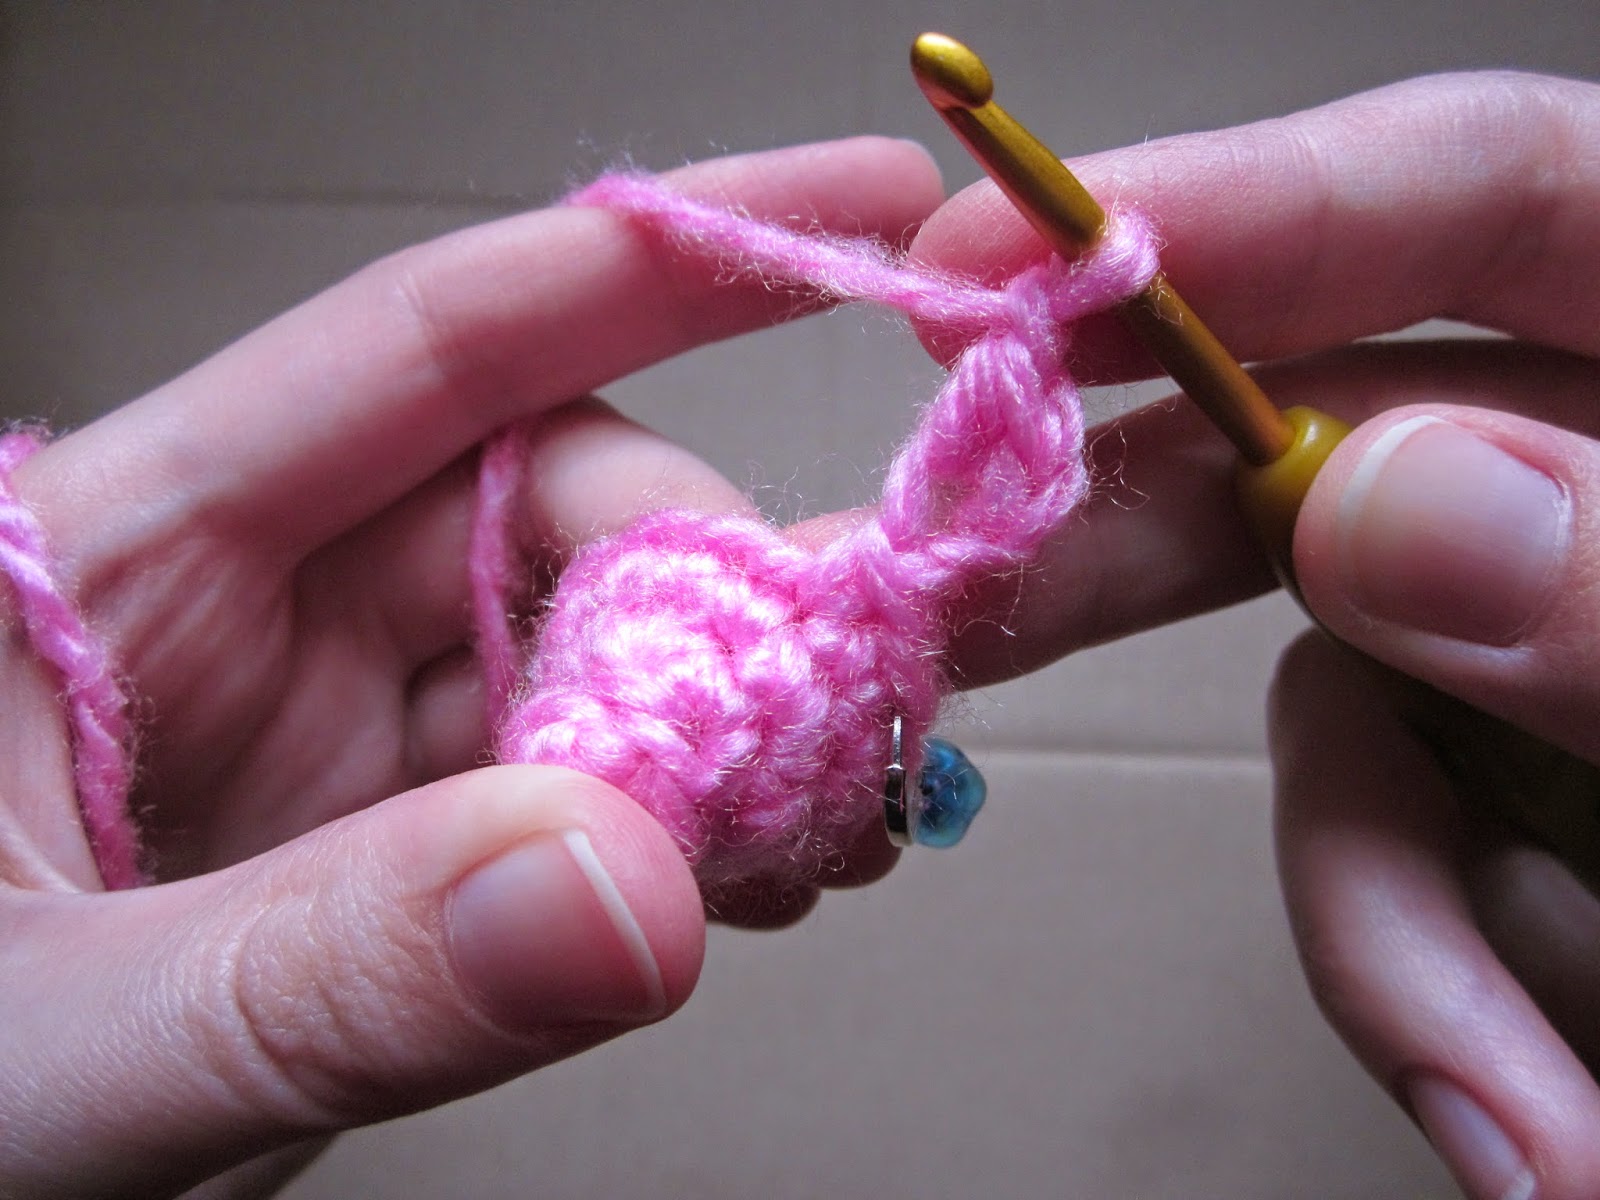
After round 6, you should have a cup shape. Remember it should be inside out relative to most amigurumi, with the more ridged side in.

 Start threading your 8" length of yarn through the inner loops, up through the middle of the stitch, counterclockwise around the circle. With a contrasting yarn as shown here, you get a striped candy cane effect. I'm using pink here so it's easy to see.
 Pull both ends out about 1.5" and tie a knot, leaving a 5" circumference ring that won't stretch out. Here I took a picture of the final version, using the same yarn as the rest of the body.
The ring should lay smoothly along the inner loops, so you can work round 7 normally, inserting the hook under both loops and the retaining ring.


Sunday, September 28, 2014

Sir Francis the Pig's Ears: A Photo Tutorial

I've gotten a few questions regarding the ears on Sir Francis the Pig. The pattern will be edited when the testing period is over to clarify a few things.

At the end of round 4, you should have something like this:
Start round 5 with sc, ch 2. The stitch marker is in the last stitch of round 4.

Now sc in the 2nd stitch from the hook, which is the first chain stitch.


   hdc in the same stitch as the sc you just made
 ch 1
 slst in the top of the hdc
hdc and sc in the same stitch as the first sc and hdc
 skip one stitch of round 4, indicated by the green arrow
3 sc across the forehead. After the first sc, if you pull the ear away from the body you can see the skipped stitch
make a second ear just like the first: ch 2, [sc, hdc, ch 1, slst in top of hdc, hdc, sc] in 2nd st from hook. Skip the next stitch as you did with the first ear, then make 6 sc.

You have now completed round 5.

In round 6, treat the two skipped stitches as part of round 5. Pull the ear outwards and towards the snout to work the stitch behind the ear, so the ears end up on the outside of the body.


Thursday, June 5, 2014

Now on Etsy!


Primarily Patterns is now on Etsy, selling vintage sewing patterns and micro crochet amigurumi. Crochet patterns will continue to only be available through Ravelry or on this blog.

Check the shop listings

Friday, May 23, 2014

Now Available: Mother-Daughter Mermaids

This pattern is now available for $6.00 USD via Ravelry.
Materials & Tools
30 yds worsted in skin color
25 yds worsted in tail color
4 yds worsted in bikini color
9 yds worsted in hair color for wig cap
25 yds metallic embroidery floss or thread (optional)
embroidery floss for face
stuffing
3.5 mm (E) crochet hook
wire slicker brush (short hair only)

Monday, April 21, 2014

Now Available: No-Sew Sea Turtle

This pattern is now available for free via Ravelry
Materials & Tools
6 yards worsted weight yarn in shell color
5 yards worsted weight yarn in body color
scrap black yarn or thread for eyes (optional)
needle for embroidery (optional)
size E crochet hook

This little turtle requires no sewing except for the optional embroidered eyes. The head, legs, and tail are worked as one and sandwiched inside the shell during construction.

Includes both written instructions and chart for legs and tail, head and shell have written instructions only.

Friday, February 21, 2014

Now Available: Hops the Bunny Rabbit

Pattern is now available for free via Ravelry
Everything except the pom-pom tail is worked in one piece, so there is minimal sewing.
Materials & Tools
15 yards worsted weight yarn
small amount yarn for tail
1 pair black 9mm safety eyes
black embroidery floss (nose/mouth)
needle for embroidery
stuffing
size E crochet hook
wire slicker brush (optional)

Tail tutorial

Tutorial: Bunny Tail Poof

This tutorial is for no more than a glorified pom-pom with tails to easily sew it on to the rabbit.

Wrap a length of yarn around two fingers until desired fullness is reached. Thinner yarn will need more wraps.

Tie another piece of yarn around the coil. This piece needs to be long enough to sew the tail to the body.

Cut the loops

Gently tease short pieces with a slicker brush to fluff up the yarn.

Tease two halves together into a sphere. Attach via yarn tails.
Once tail is attached, trim to the appropriate size.